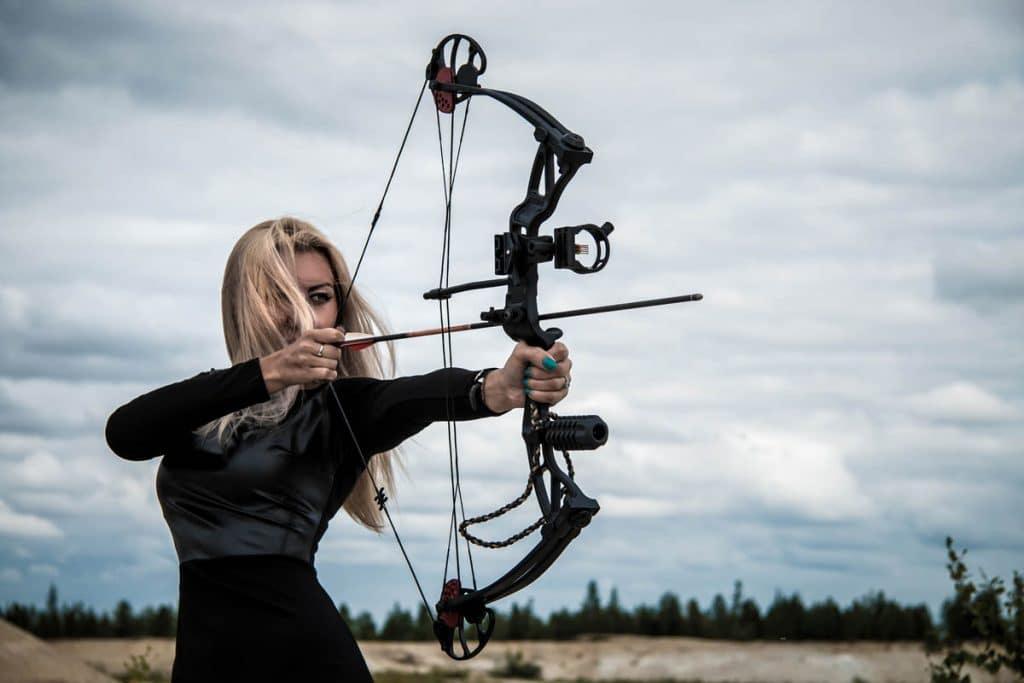

Newcomers looking to get into archery come across two popular bow styles, namely the recurve bow and the compound bow. One look at both bows quickly tells you the difference with the recurve bow being much simpler and more basic than its compound counterpart.
The compound bow, on the other hand, presents a much more modern design. Some even call it the contemporary cousin of the recurve with its many mechanisms of wheels and pulleys. This contraption-like construction of the compound bow allows the bow to shoot from greater distances with more accuracy than the traditional bow. But given their complex pulley systems, the ability to accommodate more accessories, and bulkier sizes means that archers need a fair bit of practice before they can master the skill of using compound bows to their advantage.
Here are some things that can help you better your skill at shooting a compound bow, whether it is for archery purposes or hunting game.
A compound bow is a great way to get into archery and bowhunting. These bows use a pully system that takes strain off the bow and provides slack for the shooter making it easier to shoot with accuracy. But that doesn’t mean that any of it comes without practice. If anything, it takes a considerable amount of patience and discipline to learn how to shoot a compound bow accurately.
Another reason that compound bows are so popular is the ability to customize them for every archer individually. Such customization lends adaptability to the experience where archers can create their own setup with add-ons best suited to target practice or bow hunting.
But unless you already have a fair bit of experience with archery, there are a number of things you have to learn while shooting a compound bow with precision and accuracy. And if you’re new to using a compound bow, then first you will have to familiarize yourself with all the parts of the bow and how they operate.
Unlike the recurve bow or even the longbow, compound bows come with a lot of maneuverable parts. At first sight, the compound bow can seem very intimidating, but as you start to understand the parts it becomes easier to understand the bow and its operation. Here are the parts of a compound bow you need to be familiar with and what they do:
This is the main part of the compound bow, and where other shooting devices like the bow sight, arrow rest, quiver and limbs get mounted to. Risers make up for the middle part of the bow and can be constructed using differently styled handles and color choices. Many bows use risers constructed out of aluminum, while higher end bows can use carbon fiber to reduce the total weight of the bow.
Limbs are the flexing points that allow for energy buildup when shooting a compound bow. They are attached to the riser and made out of pliable fiberglass planks. They are built to flex just so to take the stress out of each shot.
Limbs on a compound bow can come in varying styles with the planks angling out anywhere from 45 degrees to almost 90 degrees. Some bows have limbs made from a single plank of fiberglass while others feature connected limbs. Called split limbs, these come with the benefit of greater pliability, generating less shock than their single-piece counterparts.
Cams are attached to the end of each limb and resemble wheels, while their function is to transfer limb energy to the strings.
Cams maneuver the bow’s draw weight mechanically so that as the string is pulled back further, it becomes less taxing to pull it back past a certain point. Each cam comes with what is called a backstop or draw stop which stops the archer from pulling the bow any further than a full draw. The backstop basically allows for a more consistent shot and steady aim.
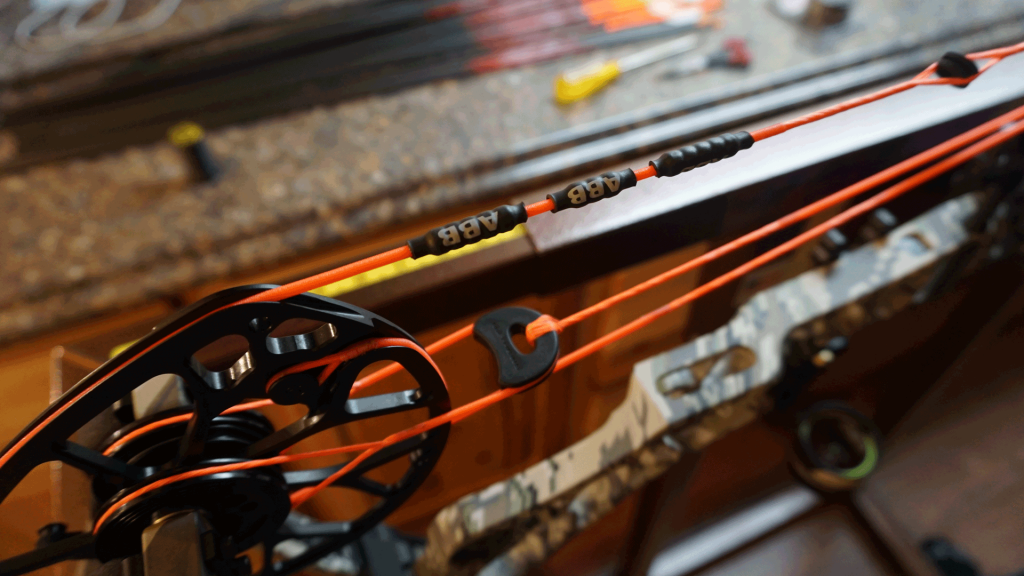
Cables extend from one end of the upper limb to the other end of the cam and compress the limbs when the bow is drawn.
The fiberglass rod which runs perpendicular to your bow’s riser is known as the cable guard. It functions to keep cables clear of the the bow’s center and allow a clear arrow passage. Another component is the cable slide which clutches the cables together keeping them away from the course of the arrow.
This is the part of the bow where the archer rests the arrow before releasing it. It works as a platform for the arrow to rest before and during the shot. Rests can come in different varieties such as the drop away, the shoot-thru and the pressure, but the one featured on starter compound bows is called the containment rest.
This type completely surrounds the arrow holding it in place prior to launching. It eliminates the concern for resting the arrow correctly and the shooter can instead focus on their form and target.
This is a small plastic aperture inserted into the bowstring’s strands. When pulled back, the archer can see through the peep sight and line up their aim.
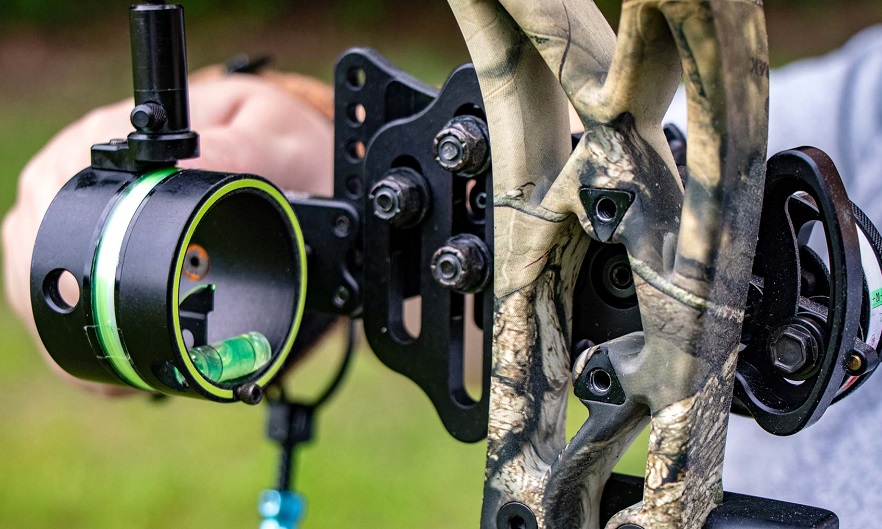
Another aiming component, the sight is a circular fixture attached to the bow’s riser just above the grip. The sight typically comes with either three or five pins within the circle to determine different distances. Some advanced compounds may contain mobile pin sights and work well for more seasoned shooters and archers.
A stabilizer an additional piece that some shooters like to add to their compound bows. It’s a long rod which attaches to the riser and protrudes out in front of the bow below the grip. As the name suggest, it stabilizes and balances the bow by adding weight to it. Along with keeping the weapon steady, stabilizers also reduce noise and vibration when shooting. This can help extend the life of you compound bow.
It’s best to add on the stabilizer to the bow before shooting.
This component is needed when you employ a mechanical release instead of using your fingers. The loop is positioned on the string at its centermost point and is for attaching a mechanical archery release. The D-loop helps pull the bow to full draw and deliver more consistent shots. The D-loop also reduces wear and tear on the bow string.
Archery of any kind requires knowledge of some basic safety tips and rules, that concern the safety of the archer as well as of the spectators, if there are any.
Beginners simply trying out the sport often opt for the recurve bow given its simpler design and operation. They find its learning curve to be simpler than that of the compound bow (only in terms of mechanisms, and not necessarily skill), and if they don’t find their interest peaking in archery, there isn’t too much of an expense at hand since recurve bows are generally cheaper than compound ones.
But if you decide that the compound bow is for you, then here is what you need to know to properly shoot a compound bow.
Make sure that the bow you have uses high quality strings that aren’t worn or heavily used. String maintenance is vital to ensure longevity of your bowstring, so you don’t end up replacing it too frequently.
You should also be aware of the essentials like how much draw pressure your bow can handle.
The stance is how you align your feet and body before taking the shot and a good stance makes the foundation for your archery training. Without the correct stance, even the best tuned bows won’t yield accuracy.
Among these considerations, foot placement is crucial since it can potentially affect arrow flight. There are two basic foot positions to take, both standing with feet shoulder width apart. The first is the square stance with feet placed in line with each other, one on either side of the shooting line. This is the simplest stance with minimal torso and abdomen rotation. The shoulders also align with the hips and feet placing minimal stress on the body. This stance is most helpful for archers with less flexibility around the back and torso.
The second stance is called the open stance involving placing the feet so that the feet, legs and hips face the target more. Start by placing the right foot on the shooting line so that the ball of the foot bisects the target line. Then place the left foot back 2 inches behind the target line. Pivoting towards the target turn your left foot so it’s not quite parallel to the target but slightly more open.
This stance requires more rotation of the upper torso and abdomen but does yield better stability and more control when firing your shot. The upper body rotation also prevents the archer from arching their back.
Hold your bow with a firm but relaxed grip. If the grip’s too tight, it will impact accuracy of the shot. You can try using a wrist sling to facilitate your grip.
Extend your bow arm directly towards the target with the string gripped firmly between your fingers or a mechanical release. Pointing your bow towards the target, pull the bowstring smoothly and firmly back to a full draw.
The position your draw hand takes as you pull the bowstring back is called anchoring. Every archer has a different anchor, with some placing the draw hand on their cheek, while other place it near the jaw. But regardless of your anchor point, each archer’s anchor point needs to rest on the face in the same spot for every shot. This is what will make the practice perfect.
When training your archery skills, it’s important to do the same thing over and over again. To reach your anchor point, take stance, nock the arrow and start pulling back. Stay true to the same position for every shot.
There are several prerequisites to taking the correct aim. First, you need to be comfortable with your stance, grip the bow, nock the arrow, draw the bowstring and find your anchor point. Once you’ve got these basics down, you need to shift the weight from your arms into your back muscles. As you do this, your draw elbow aligns with your arrow giving you a better aiming position. Focus on your pin and release the shot.
To hit the mark, you need a smooth release by relaxing all your fingers completely before releasing the string for the shot. Even the slightest of tension in the fingers can make you miss your mark.
Keep your aim till your arrow hits the target. Follow-through in archery is important to make sure that you don’t move your bow or your body too early to affect your shot negatively.
Once you know the setup of a compound bow, you need to master the steps to establish consistency in your form style and shooting accuracy.
Most users will opt for a mechanical release when learning how to use a compound bow more accurately. This piece of equipment ensures the accuracy of the arrow’s trajectory and comes fitted with a trigger allowing the shooter to forgo using fingers to release the arrow. Using a mechanical release end in a speedier bowstring release with a minimal amount of torque placed on the string. This results in greater firing accuracy.
So, if you’re going to use a mechanical release, this is the starting point. Attach your release to your compound bow. If you’re going to use your fingers for the release, you can skip this step.
Next comes nocking your arrow. The nock refers to the notch at the end of the arrow which fits the arrow into the bowstring. A correctly nocked arrow contacts the bow at two points; the string and the rest. This ensures that the arrow won’t come into contact with any other art of the bow which may otherwise deflect its trajectory.
This step involves positioning the arrow in the center of the power stroke of the string. This means aligning the string with the center of the bow, the center of the limbs and the center of the riser. There are a number of different tools that can help you find the center shot easily so it may be worth looking into these.
Your stance and the way you hold the bow is taking proper form. You should stand perpendicular to the target with enough clearance present along your chest and bow arm (refer to stance mentioned earlier in the article).
To draw, your arm holding the bow should be parallel to the ground. Pull the drawstring straight back shifting your power into your back muscles. This will make for smoother shot sand reduce muscle strain and fatigue.
Draw the bowstring to your anchor point, align the sight to the target and slowly squeeze the mechanical release trigger. Don’t forget to follow-through.
Along with knowing the steps of how to shoot a compound bow and arrow, you also need to know some terms that will give you a better understanding of what you’re dealing with when using a compound bow. Some important terminology you should understand includes the following:
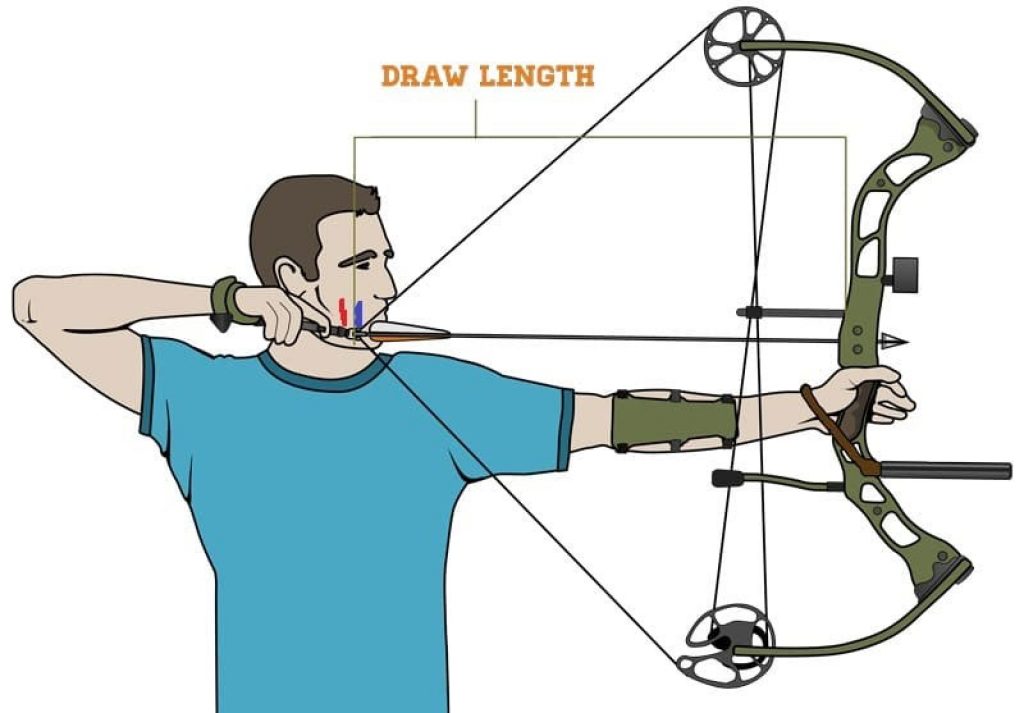
The draw length provides the ideal distance between the grip and a full drawn bowstring for the archer’s body. If the distance remains too short, the shooter will tend to bend their elbow and shoot inconsistently. Conversely, if the distance is too long, it may be impossible for the shooter to reach full draw.
Draw length will also factor in when you decide the length of the arrows you will use.
Another measurement compound bow users have to be aware of is the draw weight. This refers to the amount of force you will need to pull the bowstring back. The draw weight is measured in pounds with the most common being in between 40 to 70 lbs. Most bows for adult male shooters will vary between this range but you can also look into others with higher draw weights. Female and youth hunters typically use bows with draw weights from 45 to 60 lbs.
Most compound bows also have an adjustable draw weight range of 10 to 15 lbs.
The heavier the draw weight of a compound bow, the greater its arrow speed and penetration ability becomes. But it doesn’t mean that beginners should necessarily start off with a heavier draw weight. That will only lead to sacrificing their shot accuracy. Instead it’s better to start off with the low end of the draw weight range of your body type and work your way up until you can handle a heavier without sacrificing accuracy. As your strength and draw improves, it will become easier to increase the amount of weight you can pull.
FPS refers to “feet per second” or how fast the arrow travels after leaving the bow. Most contemporary compound bows can shoot at a speed between 300 and 340 FPS.
This is a term used to talk about the reduction in draw weight that occurs when an archer pulls the bowstring all the way back. This allows the archer to take more time aiming and is especially useful for hunting situations. Of course, heavier draw weights are considered superior for their ability to pierce arrows through game, but a hunter may need to draw their bow early to avoid being seen by their target. And holding the bowstring at full draw for an extended period can give them the perfect shot.
Even holding just 20% of the bow’s peak draw weight at full draw can make the shot much easier to take.
Accuracy with a compound bow can mean the difference between a hit or a miss. With this in mind, here are some tips to improve accuracy when doing target practice or hunting.
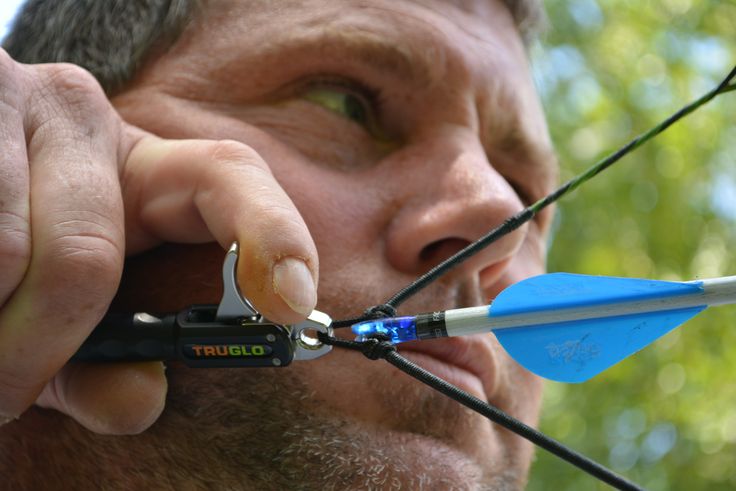
Compound bows give you the option of pulling the bow back the old-fashioned way with your fingers, or using a mechanical release. This is a device that the archer wears on their hand and wrist to pull the bowstring back.
The release comes with a small clip that gets attached to the D-loop on the string and as the string is pulled back, you simply pull a trigger that opens the clip and releases the bowstring. Using the mechanical release makes shooting a lot easier than using the finger release way.
Because it’s harder to ensure that all three fingers release at the same time without plucking the string, many novice and even seasoned archers opt for the mechanical release. Here is a useful video to understand the difference between the two techniques:
Even though compound bows make accurate shooting easier, sometimes archers are still unable to hit the mark. Arrows that don’t hit their mark are often the result of some very common mistakes compound bow shooters make. Some of these include the following:
Achieving accuracy with a bow isn’t something that happens overnight. Instead, it takes a lot of practice and patience. While not every shooter has the same stance or form, they do all work with a shooting style which they can repeat every time they draw their bow. Once you’ve established yours, accuracy and precision will follow naturally.


