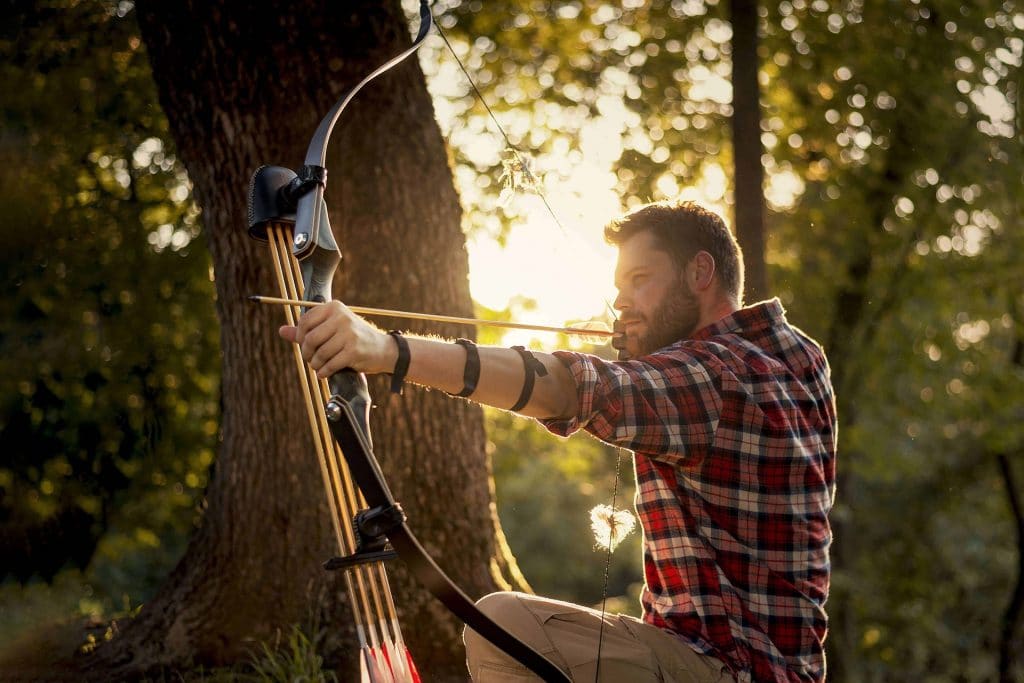

A true huntsman can use his natural surroundings to make all the necessary tools. And that includes having the knowledge around how to make a bow and arrow. While there is no shortage of ready-made bows for hunting, there’s a certain satisfaction in knowing that if you were trapped in the woods, you could indeed be able to survive.
Today we’re going to look at the materials you need and the steps to follow in order to make a homemade bow and arrow. We’ll look at ways to find the best piece of wood in the forest and how to craft arrows that will allow you to hunt with speed and accuracy. And, if you find yourself a bit frustrated with your DIY efforts, we’ll also recommend a few hunting accessories that you can purchase just in case your bow and arrow isn’t quite what you have envisioned.
![]() There’s no doubt that if you had access to your vast array of tools at home, you could make the perfect bow and accompanying arrows. But we’re here to walk you through how to craft one when out on your own, surrounded only by what nature can provide.
There’s no doubt that if you had access to your vast array of tools at home, you could make the perfect bow and accompanying arrows. But we’re here to walk you through how to craft one when out on your own, surrounded only by what nature can provide.
There are some tools that you can bring with you, but these will be focused on the standard tools that you should always take with you on a camping trip.
If you’re not sure what we mean, thing the small items that can fit in a backpack, such as a hatchet, nylon rope, and a pocketknife. Even if you weren’t on a mission to create a bow from scratch, these tools are pretty standard with any backpacking adventure.
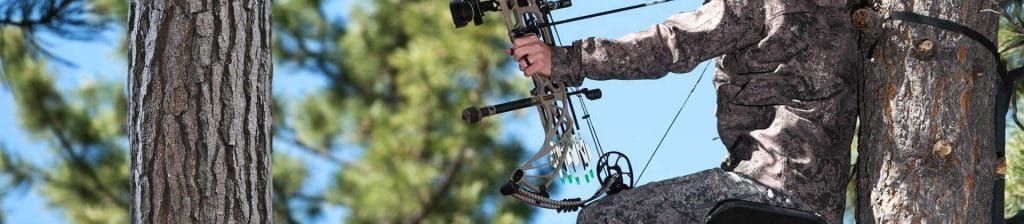
Making a bow takes a bit of time and some skill. If you aren’t sure if you have this combination, you can check out this list of the best recurve bows for hunting as an alternative.
The tools to help you craft a bow and arrow while out in the woods will be only what you have in your backpack. You can prepare better and pack more but remember that you will have to carry everything, so you won’t have all the conveniences you would like.
![]() We really can’t stress this enough. When you are out in the middle of nowhere, safety needs to be paramount. It doesn’t matter how extensive your first aid kit is. If you cut yourself deeply, or try to impress your friends with acrobatic movements and break a limb, you are stuck.
We really can’t stress this enough. When you are out in the middle of nowhere, safety needs to be paramount. It doesn’t matter how extensive your first aid kit is. If you cut yourself deeply, or try to impress your friends with acrobatic movements and break a limb, you are stuck.
The first step in safety is prevention. Don’t try to impress others and instead, be aware of your limitations. It’s ok to ask for help when you are camping.
When using sharp tools, be sure to keep them stored properly. The KURUI Wood Chopping Axe with Sheath is an excellent tool to have and because it comes with a sheath, you can store it when not in use and keep yourself free of accidents.
Second, make sure you have a first aid kit. You might not want to waste precious space in your backpack, but having a well-stocked first aid kit, complete with sterile bandages and disinfectant can prevent infection from setting in. Remember that you are surrounded by dirt and if you do het hurt, keeping the wound clean is priority one.
Finally, make sure other people know where you are. If you are camping in the backwoods, always tell a friend or family member where you are headed and when you will return. This way, if you do get stuck, Search and Rescue will be able to locate you. Having a satellite phone is also a solid idea. Cell service is virtually non-existent in the woods, so having a special satellite phone in case of an emergency is an important tool to have.
Out in the forest, you have only a limited number of supplies. What is your backpack and what you can scavenge are your only resources. You may want to simply see if you can make a bow while out on a camping trip. In this case, simply practice and have fun.
However, if you are stuck in the forest and need to find a means of survival, a well-crafted bow can help you hunt for your next meal. As good as you are, your DIY bow and arrows will probably not be able to take down a large elk. They may, however, net you a rabbit or small animal that will keep you nourished.
![]() Perhaps the most important step for crafting a bow in the forest is to find the right stick. This might take a while so be patient. If you start with an inferior stick, you will just have to go back to the beginning when it doesn’t work out.
Perhaps the most important step for crafting a bow in the forest is to find the right stick. This might take a while so be patient. If you start with an inferior stick, you will just have to go back to the beginning when it doesn’t work out.
Start by finding a stick that is about six feet tall, or roughly your own height. This will give it enough space to bend and be useful. The wood should be fairly smooth and not have any twists or knots in it. If there are weak points in the stick, it will break when you try to bend it.
Finally, the stick should be somewhat flexible. Remember that you will eventually by bending it, so you don’t want a completely rigid stick. While not everyone knows their types of wood, the best types are mulberry, juniper, or bamboo.
You might be tempted to use a live piece, or green piece of wood. While this will offer more flexibility, dry wood stick will have more power when you use it.
You will need to bend your stick so start by looking it over. Your stick will naturally bend a certain way and you want to use this momentum. If you bend it the opposite way, the stick will simply break.
To find the natural curve, you can place the stick upwards from the ground. Then, gently move it around. The natural curve in the stick will show you which way it wants to move.
You will be holding your bow from the middle, which is called the handhold. This can vary a little bit but is usually about six inches in size. The remaining sides of the bow are called the upper limb and lower limb.
![]() In order to make your bow as flexible as possible, you will need to shape it slightly. Be careful with this step because if you cut off too much of the stick, it will weaken and break easily.
In order to make your bow as flexible as possible, you will need to shape it slightly. Be careful with this step because if you cut off too much of the stick, it will weaken and break easily.
Keep the bow propped up, with one end in the dirt. Then, lightly bend it. The areas that don’t want to bend can be softened up with a pocketknife. Take a few slices off from these areas and test the flexibility again.
The goal is to have the bow almost completely symmetrical. The curve on one side should mimic the curve on the other side.
You shouldn’t have to touch the middle, handle part of the bow too much. This needs to be nice and strong, so try to leave it alone.
As you can see from this step, having a quality pocketknife is a must. If you are looking or a decent item, try the Ruike Tactical Pocket Knife. Its sharp blade will be a valuable resource when out in the middle of a forest.
![]() The second part of the bow is all about the string. You want the string to be nice and secure to provide a taut line to hold your arrows.
The second part of the bow is all about the string. You want the string to be nice and secure to provide a taut line to hold your arrows.
Measure about two inches in from each end of your bow. This distance on either end needs to be equal. Then, use your pocketknife to cut small notches. Start your notches on the side of your bow and then press inwards. Don’t cut the back part of your bow and keep the notches shallow. You can always make them deeper later on, so start slowly. The goal is to have notches that are just deep enough to hold the string but not cut into the bow completely.
![]() Now that you have the notches made for your bow, the next step is selecting what kind of string you will use. If you didn’t plan to make a bow in the middle of the forest, you will have to use whatever is already in your backpack. However, if you know ahead of time that you want to craft a new weapon, you should pack accordingly.
Now that you have the notches made for your bow, the next step is selecting what kind of string you will use. If you didn’t plan to make a bow in the middle of the forest, you will have to use whatever is already in your backpack. However, if you know ahead of time that you want to craft a new weapon, you should pack accordingly.
There are a few options when it comes to the bow string. Thin nylon rope is an excellent option. It is very strong and, as long as it is thin, it will fit into your notches quite well.
Another common option is ordinary twine. This may be a bit lax so be sure to tie it very tight in order to get enough power when shooting your arrow. Hemp cord is also a viable option.
Finally, you can use fishing line. This is quite thin so be careful as it can accidentally cut into your hands. It may also stretch out as you tie it, so keep that in mind.
Setting the string on your bow is an important step. You want to use the right knot. Otherwise, the string can become too loose and you won’t have any over from it.
Start by crafting a loose loop of your string. Then, move it over your bow until it lines up with the notch. Then, pull the loop tight.
Repeat the action on the other side of the bow. Having the right knot is crucial as it will allow you to tighten the string on both sides. The tighter you pull on your string, the more your stick will bend. Go slowly but your ideal shape will be a crescent with the bow and the string as tight as possible.
Now that your bow has a string on it, it is time to test it out. This is called tillering your bow. Aim the bow towards the sky and pull on the bow. With this motion, you can check your construction.
You want the bow to curve evenly on both sides. You also want the string to be able to stretch down to your shoulder while keeping one arm stretched completely out. If this does not happen, you can shape the bow or tighten the string.
Making arrows while in the forest can be as simple or complex as you want it to be. Remember that the arrow needs to be solid and have a firm but pointy end. As long as you stick to these criteria, you should have success.
Just as you need to spend a bit of time looking for the perfect bow stick, you also need to look carefully for the perfect arrow sticks. These should be nice and straight. They should also be about three feet long, or half the length of your bow.
Arrow sticks need to be dead wood. If it is too green, it won’t have the right weight to it. If you have time, you can select greener wood and then dry the sticks out next to a fire. If you know your wood types, try to look for goldenrod as it has a nice, straight shape to it.
It’s always better to find more arrows than you will need to spend time gathering extra arrows, just in case. It’s easier to sort through your collected sticks once you have them all gathered rather than going one by one on the forest floor.
Now that you have all your arrow sticks, you can go about shaping them. Take your pocketknife and gently smooth the wood on its sides. This will help it glide over the string and will prevent splinters in your hands.
At the end of the wider part of your stick, you will want to carve a small notch. This should be just larger than the width of the string as you will need to fit the arrow into the string to hold it secure.
If your arrows are almost straight but not quite, you can actually try to straighten them out a bit. Make a fire and let it burn down to the coals. Then, gently hold the stick atop of the coals. You want heat but not fire as the stick will burn if it becomes too close. The heat from the coals will warm up the wood and you can then adjust it into a straighter appearance.
![]() You have two options for your arrow point and this will depend on your skill and what you want the arrow to be used for.
You have two options for your arrow point and this will depend on your skill and what you want the arrow to be used for.
The simplest option is to carve the point of your arrow. Take your pocketknife and slowly carve the end of your stick into a point. If this is the route you want to try, it’s best to keep the arrow larger than three feet, in case you need to start over or your point isn’t what you want it to be.
Those that want to really test their handyman skills can try to make an arrowhead. For this, you will need a sharp rock, a piece of metal, or a bone. Even if the object is sort of pointy, you will want to craft it further. Take a rock hammer and gently chip away until your arrowhead is as sharp as possible.
Then, make a notch at the front of your arrow. Use a thin piece of wire or string and securely tie the arrowhead to your arrow.
![]() Fletchings optional, so if this step seems too labor-intensive, you can skip it. However, fletchings will help your arrow fly straight so if you are having issues, you may want to pause and work on this step a bit more.
Fletchings optional, so if this step seems too labor-intensive, you can skip it. However, fletchings will help your arrow fly straight so if you are having issues, you may want to pause and work on this step a bit more.
Scavenge around the forest and look for feathers. You can also bring some form home if you are short on time or are worried about not finding them in the forest.
The easiest way to attach your feathers is with glue. If you don’t have any, you can use string to secure them to your arrow. Three feathers will provide the most aerodynamic options.
Remember that while fletchings look cool and can help with guiding, they take a lot of time. If you are trying to merely survive until help comes to you, this is a step you can go without.
Crafting a bow and arrow in the forest is a real excitement. It’s a fun way to discover just how adept you are at surviving in the wilderness. However, if you want a slightly easier way to make a homemade bow and arrow, you can do so in your own backyard. This way you have access to all the tools in your garage and if need be, you can pop over to your local hardwood store for extra supplies.
If you want some inspiration to see what your homemade bow could look like, this list of the best recurve bows can help you out.
With food prices continuing to rise Trusted Source Rising inflation has made it more expensive to eat at home—here’s how much grocery prices have increased Inflation continued to climb in March, as prices for consumer goods rose by 8.5%, according to the Labor Department — the largest year-on-year increase since February 1981. www.cnbc.com , mane people are now turning to alternative ways to provide for their families. Backyard gardens are increasing and some are even turning to hunting as a way to find food. If you are interested in trying your luck in the backwoods, starting with a solid bow and arrow set is the best way to go.
![]() Here are some tools you will need for your homemade bow and arrow. You can substitute some tools, according to what you need or how rustic you want the construction to be.
Here are some tools you will need for your homemade bow and arrow. You can substitute some tools, according to what you need or how rustic you want the construction to be.
Just as with a woods-inspired bow, you will need to start with a good piece of wood for your homemade bow. However, because you are working at home, you have a few more options than what you can find in your immediate surroundings.
Some woodworkers will still go into a local forest or wooded area to find a solid piece of wood. Others will ask around or meet with professional craftsmen to find the right piece. Whatever you find, make sure the piece of wood is at least six feet tall and is made from a flexible wood. Hickory and elm are great types to start with.
The piece of wood you start out with should also be nice and straight and not have any knots on it. You can look at the bark to determine how straight the wood is. If there are a lot of spirals in the bark, it means that the wood underneath is too twisted.
If your piece of wood still has bark on it, now is the time to remove it. Dry wood is preferred for making a bow, so you may need to leave your wood out for a few days to allow it to dry.
![]() Unlike a simple bow, with the tools you have at home, you can actually carve a proper device. With a piece of chalk, draw your measurements for your bow. This will include a handle in the middle that should be four to six inches long, and about 1 ½ inches thick. As the handles move out, the total length should be about 64 inches.
Unlike a simple bow, with the tools you have at home, you can actually carve a proper device. With a piece of chalk, draw your measurements for your bow. This will include a handle in the middle that should be four to six inches long, and about 1 ½ inches thick. As the handles move out, the total length should be about 64 inches.
Now that you have marked where you want to cut, you can get into it. Start with a hatchet to carve away larger pieces and then move into a sander for finer details. A drawknife is also a useful tool.
Go slowly with this step as you don’t want to cut too much out. Take your time and keep looking back to ensure all your measurements are still accurate.
Wood that is fresh will crack if dried too quickly. If your wood is still green, you can take this time to now dry it properly. Using heat can do this task quickly.
Dig up an area in the ground that is the same length as your bow. Fill it with wood, light a fire, and wait until it burns down to coals. Place a tin can at either end of the trench so you can rest your bow on top of them. This way the bow will dry out but won’t burn. You can leave it overnight.
![]() A piece of wood that can’t bend is a staff, not a bow, so the next step is all about creating that bending motion. To do this, you want to tiller your bow, which requires you to remove part of the wood on the inside, or belly of the bow. Again, this step needs patience because if you remove too much wood in the area, the bow will be too weak and will break.
A piece of wood that can’t bend is a staff, not a bow, so the next step is all about creating that bending motion. To do this, you want to tiller your bow, which requires you to remove part of the wood on the inside, or belly of the bow. Again, this step needs patience because if you remove too much wood in the area, the bow will be too weak and will break.
Slowly remove wood from the area and keep testing its bend. The bow should be equal in flexibility so you may have to go back and forth between each side.
Now we’ll move on to completing the bow. You will need to attach a string and the best way is to create two nocks, one on each end of the bow. This will be a small groove where you can tie your string.
Be sure to sand the area nicely as if it is too rough, the string will quickly break off.
Another area that needs some help is where you will place your arrow. In the woods, there isn’t much need for this, and the arrow will simply rest on your bow. However, with a bit more time and effort, you can create a shelf to rest your arrow on. This will be at the front of the bow, just by the handle.
Don’t cut too deep in this area or else it will weaken the whole bow. Instead, cut about ¼ of an inch in. You can always adjust this depth once you craft your arrows and test out you bow. Remember that it is far easier to make another cut later on than to have too deep a cut at the beginning.
After everything is carved out nicely on your bow, you will want to finish everything together. The entire bow needs to be sanded, so start with a rougher grit and then work your ways to a finer grit. Splinters should be avoided at all costs.
Your bow will also need a good sealer. You will be outside in the elements and a sealer will protect your bow and all your hard work from rain and dirt.
One last piece is attaching the string for your bow. Start with looping one end of the bowstring around a nock and then work on the other side. The loops should be in a fashion that you can easily tighten them so they are even.
While there are many materials you can use, the best method is to use a standard bowstring that you can purchase. This will ensure you have a steady hand and that the string is of decent quality.
![]() You can’t have a bow without arrows, so the next step is pretty obvious. You can cut a few corners on this stage in order to produce arrows that are of excellent quality.
You can’t have a bow without arrows, so the next step is pretty obvious. You can cut a few corners on this stage in order to produce arrows that are of excellent quality.
Instead of merely going out into the forest to find wood for arrows, you can order proper shafts online. If you don’t want to quite cut so many corners, you can also head to a local hardware store to find pieces of wood that are pre-cut and will work for arrows.
With a knife, you will need to cut the point ends into proper sharp areas. You can also cut out a small area at the rear of the arrow as a place to fit into your bowstring as your aim.
The wood will probably be untreated, so staining is the next step. You can be creative here and decide on whatever colors you want. Finally, find some feathers, again in whatever design you want, and add them to your arrow shaft.
Before you go out and try to use your new bow and arrow on a hunt, practice, practice, and practice more. This is the time to make adjustments, so try shooting your arrows and see just how well the bow is strung. If the string is too loose, be sure to tighten it. If the arrows don’t fly straight, adjust the fletching.
You also want to get a good feel for your bow and arrow. The more comfortable you are with using it, the more confident you can be when out hunting.
Hopefully, all your hard work will pay off. If not, we’ll leave this list of the best bows under 500 dollars, just in case you want a professional tool.
Being out in nature is an exciting opportunity. You can practice your survival skills and see just what you are capable of. While there may come a time when you need to make a bow and arrow for survival, we hope that if you do decide to craft your own weapon that it is out of curiosity and not necessity. Making a bow and arrow can be done with simple found objects, such as sticks and sharp rocks. You can try your construction completely on your own or you can look around your home for a slightly more sophisticated setup. Learning how to make a bow and arrow is a fun activity and you can do it solo or with your family. There has been a rise in DIY crafts Trusted Source Health Benefits of Crafting I love the feeling I get after completing an art project that I was working on. I stare at it. Sit back and smile. That’s it! The joy of creating something with your hands makes you feel amazing. You may be feeling stressed or tense before you start but at the end you feel calm and happy — satisfied deep in your soul. There is something to be said about crafting and its effects on one’s well-being! pariscorp.com and bow and arrows are a great way to channel your inner crafter. It’s always a good idea to learn survival skills and it is way better to go camping prepared for anything.