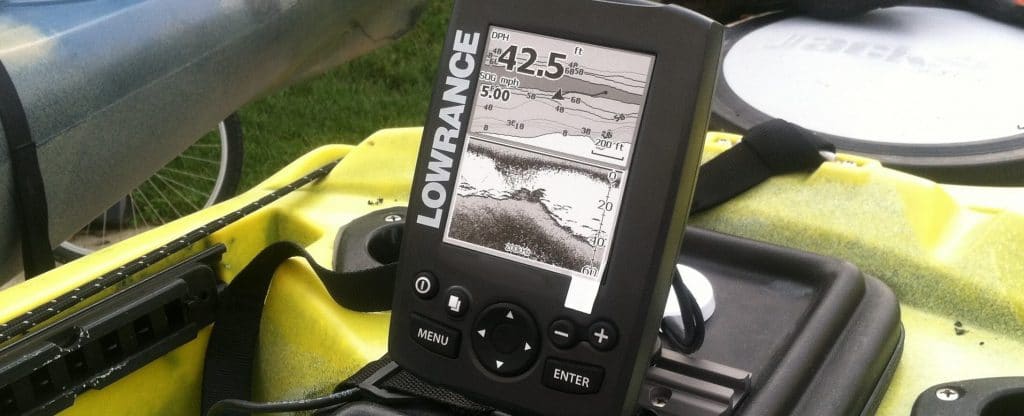

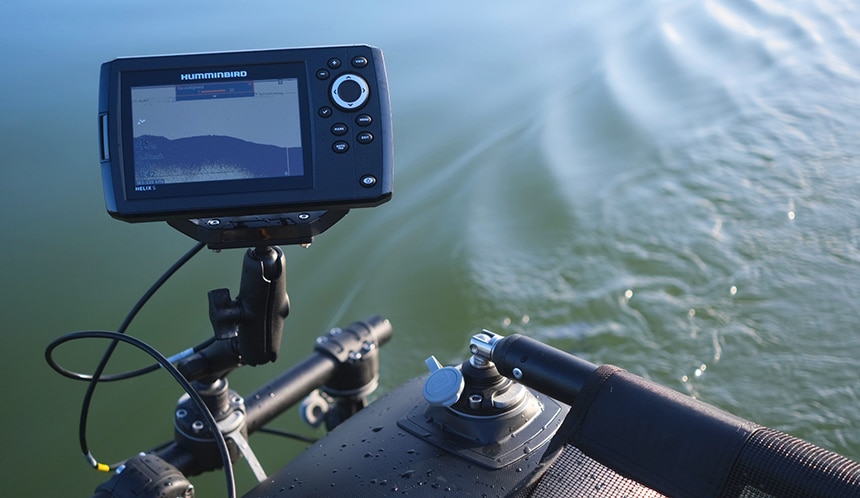
A Humminbird fish finder is an important tool for beginners in kayak or boat fishing. It helps anglers unravel what’s beneath the sea using a transducer which utilizes sonar technology combined with a GPS feature. All this allows the fish finder to display a clear image of what lies underneath the water. This includes the location of fishes, trenches, vegetation, and all other features that makes up the aquatic world.
This machine utilizes sonar technology, so it’s common sense to learn how to read a Humminbird fish finder before getting one. Just like every other sonar device, this fish finder helps you identify what lies underneath by sending pulses of waves under the sea.
When the wave strikes an object, they reflect on the screen of the fish finder. The machine then calculates the distance it takes to hit the object as well as how long it took to receive the return impulse. All these factors allow the fish finder to calculate the depth, water speed, as well as temperature.
Most times, the strength of the pulse is determined by the size of the object struck. The larger the object is, the stronger the pulse will be and vice versa. Hence, you would expect a stronger signal when the wave hits a giant catfish than when it collides with a tuna.
As with most new devices, interpreting all the signals on the screen could be overwhelming, but this is not to discourage you. Once you get the hang of it, you will be able to operate the Humminbird fish finder with both eyes closed.
If you haven’t gotten the first-hand experience on how to use a fish finder, you’re bound to get confused the first time the screen of this device comes up. Why? There are several icons, and it’s difficult to know what each one stands for.
Before proceeding to the steps, we advise you to go through the user manual to have a better understanding of what each key represents, as well as how to use all the functions in your device.
If you’re clueless about how to read a Humminbird fish finder screen, here is a detailed step-by-step guide to help you achieve that.
It’s important to learn how to use this device beforehand so you will be able to use straight out of the box once you acquire yours. We do not recommend you get the device before learning how to use it. This is because the Humminbird fish finder is delicate and overwhelming at its best. There are several signals to read, and you could easily get confused.
For some reason, learning how to use beforehand gives you a clearer picture of how each model operates. This way, you’re able to make the right choice for your kayak. You will also be aware of the features a good fish finder should provide relative to your needs.
You should also know that the Humminbird device requires some technical set up. This is likely to cost you a few extra bucks if you decide to hire someone to carry out the setup process for you. Keep in mind that every model requires different installation processes, and you would have to go through the hassle of searching for someone with the right installation skills.
Taking a look at all the points mentioned above, you can tell that it’s better to gain the first-hand experience before buying your fish finder. This saves you from added expenses and avoidable errors from incompetent technicians.
The Humminbird fish finder is not difficult to use. They’re designed for anglers, so there are no technical details involved. But you do need to learn how to interpret the signals on your screen to be able to utilize the device properly. This goes beyond identifying fish icons, sizes, etc.
The trick goes deeper than that. The first principle of operation for a fish finder is to know how to interpret the variables displayed by the indicators. This includes depth, temperature as well as speed rate.
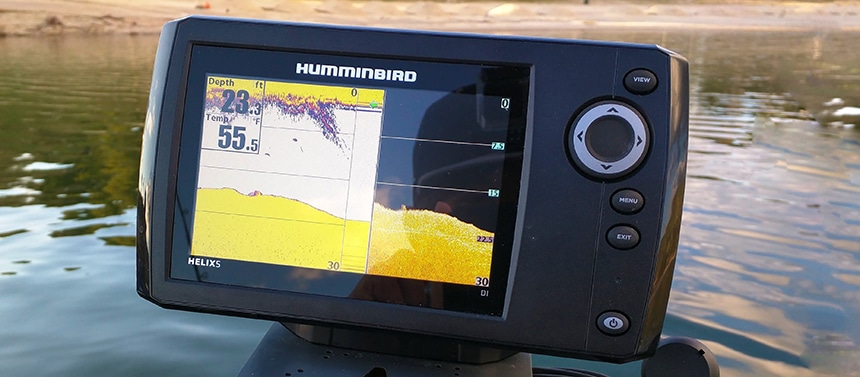
Understanding depth is one of the basic skills all anglers should possess. The design of the device might be different, but the working principles are alike. The Humminbird fish finder has a depth sensor attached to its transducer. What this does is that it allows you to determine how deep or shallow the water is.
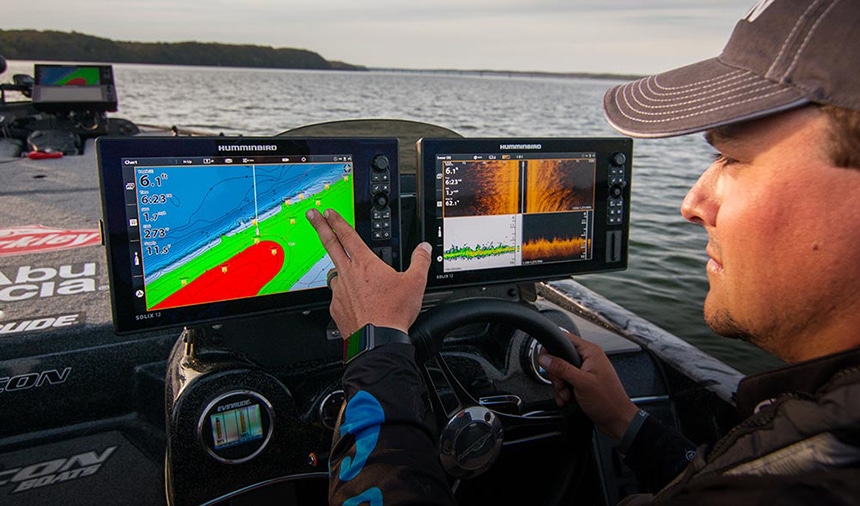
Also, this gives you an idea of the species of fishes that are likely to appear at a certain depth. Combined with the GPS feature, anglers can determine the location of their boat, and you can configure their device to paddle at a specific depth without dropping off to dead zones. There are also different color options to help differentiate one depth from another.
The Humminbird fish finder covers up to 1500 feet in depth. This is not the best number in the market, but those who offer more are much expensive.
Most anglers need to get a separate temperature sensor for their device, but the Humminbird device comes pre-installed with a temperature sensor. The sensor reads the temperature at different water levels. The indicated temperature range is between 25 and 99.9 Celsius. In addition to the pre-installed sensor, you can also connect the temperature gauge to get the best results.
The rate sensor works hand in hand with a depth sensor. What it does is calculates water speed. The speed rate indicated by the speedometer of your boat would be different from the one indicated on your fish finder. This is because the fish finder measures water pressure while sending signals at different frequencies.
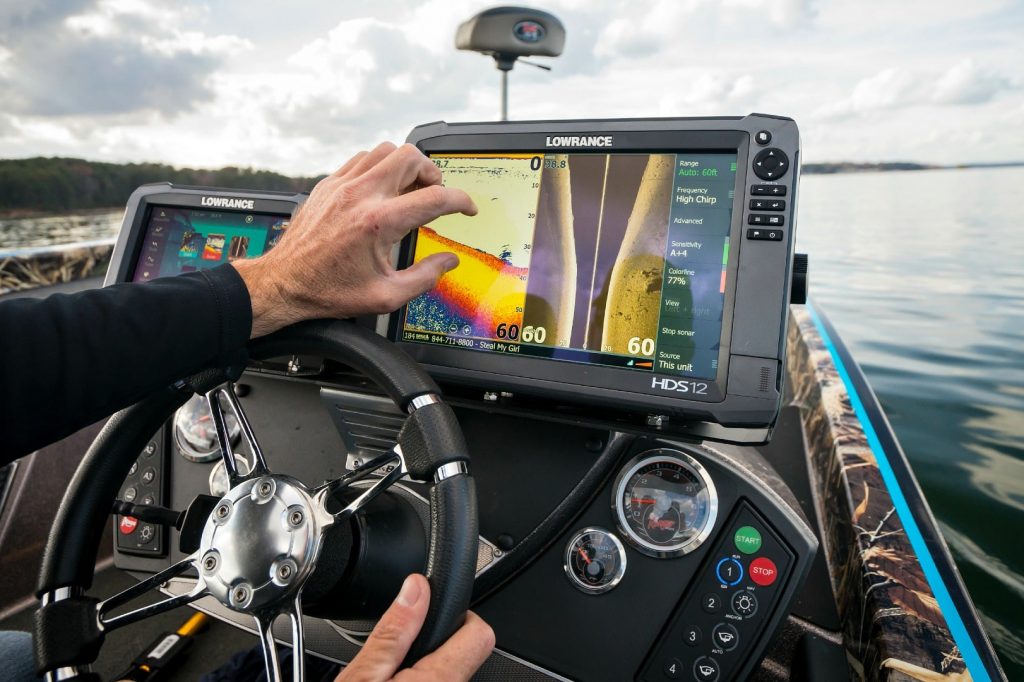
The Humminbird fish finder displays its information from left to right, just like reading a newspaper. This means old information is displayed on the left while the current one floats to the right. If you’re stagnant, the variable displayed on the indicators hardly changes, but once you set into motion and the transducer sends a wave below the water, the device will show a different image on the screen.
In terms of image presentation, there are different methods. We have down imaging and side imaging. Most Humminbird devices provide both image options.
On side imaging mode, the angler will be able to access the side view of their boat. It will help them understand what goes on under the boat as well. Side imaging helps you find objects you never had an idea were present in the water.
Still, in this mode, you will also be able to view the direction of the sonar wave as you move in the water. You will have a detailed look at fishes, terrain, and vegetation. But the objects deep down the sea will only appear as shadows.
Down imaging is much more convincing than side imaging. It shows you the location of the fish and provides extra details of the image. Down imaging mode is best in shallow water, and combined with the GPS navigation the Humminbird finder provides, it’s easier to pinpoint the exact location of fishes.
If you ever thought learning how to read a Humminbird fish finder is difficult, after going through this, we’re confident that the screen won’t look strange to you anymore. The essence of this device is to enhance your chances of landing a big catch.
The images produced on the screen of the Humminbird are crisp and detailed. With the GPS combo, you can predict the location of your catch with precision.